If you run an online business, you probably want to send out personalized mass emails. Sometimes, you may only need to send the same email to multiple recipients separately without showing all the email addresses.
In this article, I will show you 3 ways to send massive personalized emails via mail merge. You can do email merge with Gmail, Outlook, or Word. If you prefer using iPhone, then I also get you covered by showing how to do mail merge on iPhone.
If you only want to discreetly send out an email to multiple recipients
No matter what email client including Gmail, Yahoo Mail, Outlook.com webmail and others you use, you can simply place all of your recipients’ email addresses in the BCC: field. And separate the email addresses with semi-colons.
When the recipients open your email, they will see your email address in the “From:” field without seeing other recipients’ emails. And they will see their own email in the “To:” field.
Method 1: mail merge with Gmail
If you want to send personalized email to multiple recipients, then you need to configure Email Merge. Mail merge allows you to separately send a custom message including the recipients’ name and other unique details to many recipients.
If you prefer using Google Spreadsheet and Gmail, then this method is for you. You can follow the steps below to set it up. It’s useful for sending out personalized emails to multiple people quickly. Technology blog Digital Inspiration offers up a Gmail tip to get this done, using Gmail with Google Docs.
Step 1. Prepare your list of recipients and other information in a Google Sheet. Install the Mail Merge with Attachments add-on.
Step 2. Click the Mail Merge add-on and select Create Merge Template. Then copy your list to the blank mail merge template in your Google Spreadsheet. You can edit the mandatory columns and add new columns if needed. 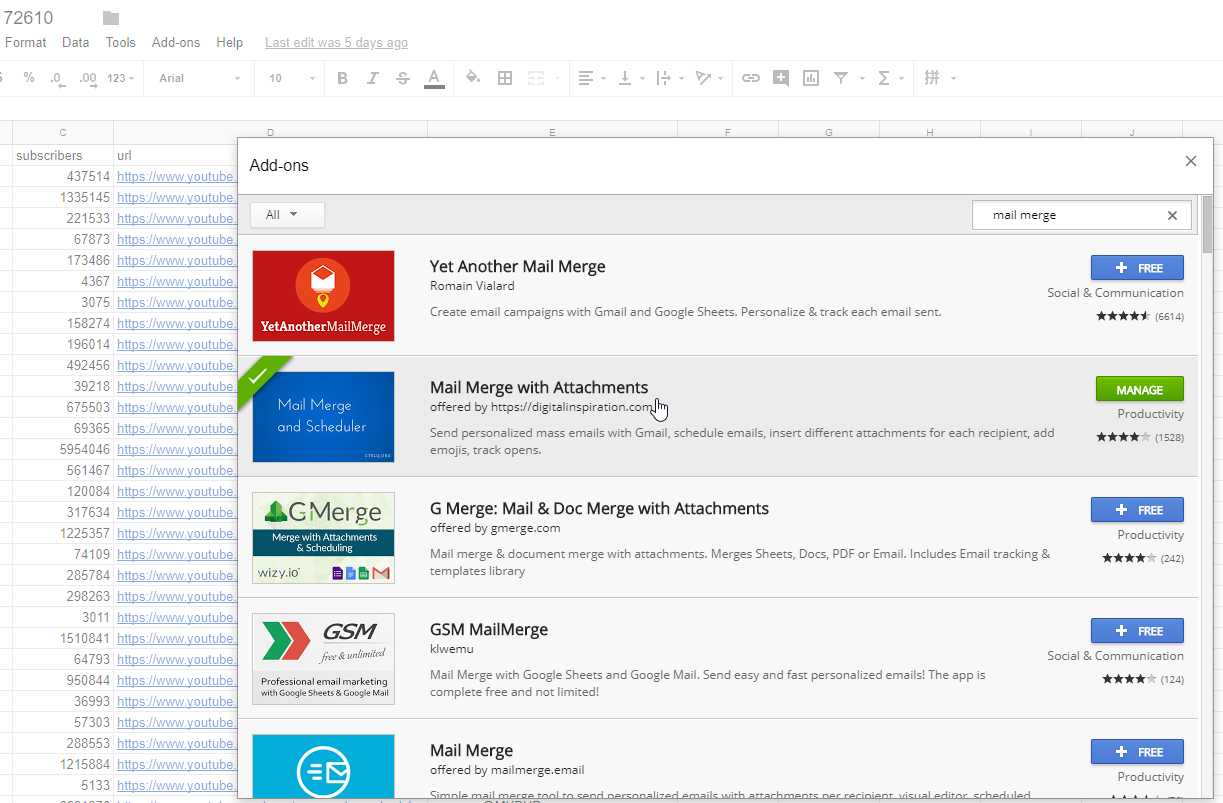
Step 3. You can add unique attachments the File Attachments column for your recipients. To do that, just go to Google Drive and copy the file URL and paste into the sheet. 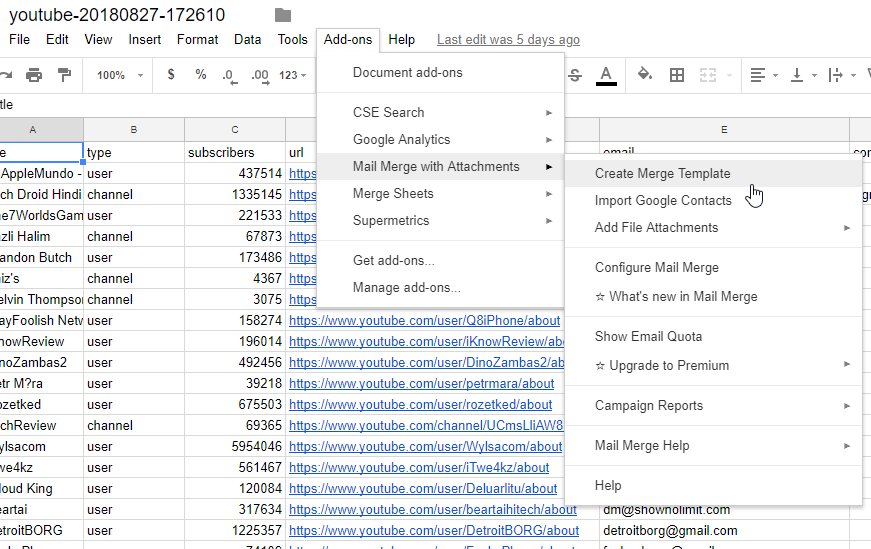
Step 4. In the Mail Merge sheet, select Configure Mail Merge and click Continue to go to the Create Email Template.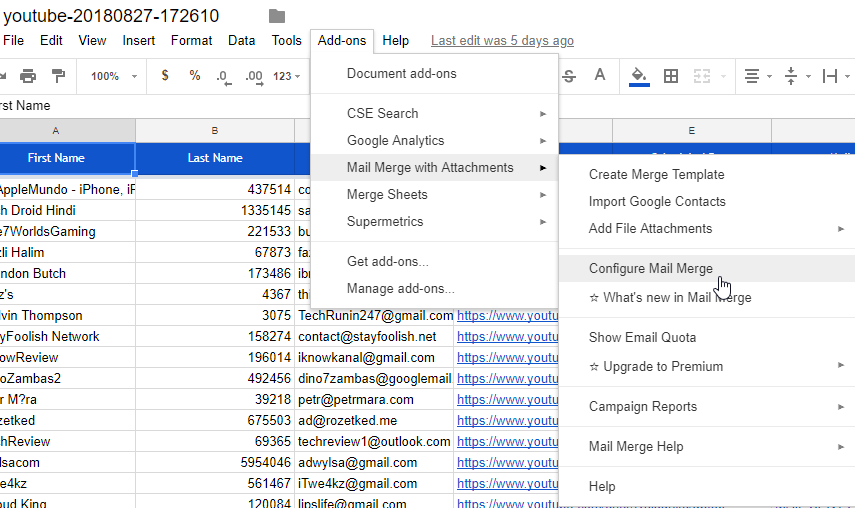
Step 5. As you see from the screenshot, you can use a visual editor, Gmail Draft, or your own HTML. It is recommended to craft a Gmail draft.
Step 6. Go to Gmail and start to write a new email. You can include one or more variable fields in the email message using the {{field name}} notation and these will be replaced with the actual values from the sheet when the emails are sent.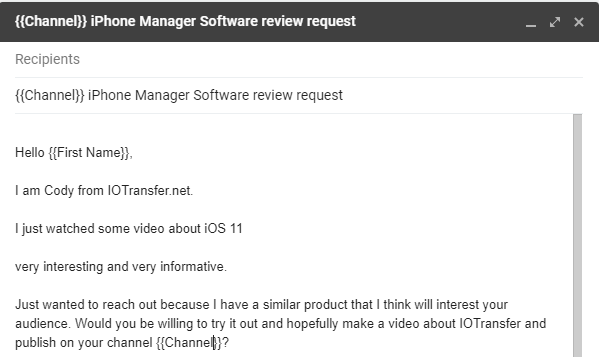
Step 7. Go to the Mail Merge sheet and select the Gmail Draft and send test email if needed, After you check the test email, then you can send out all these emails.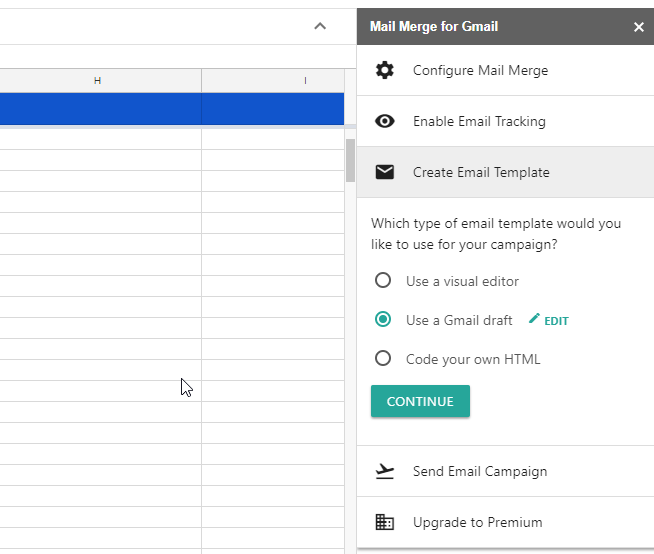
This free version of this add-on allows email up to 25 recipients a day (updated in 2021). If you upgrade to the premium version, then you send emails to 300 recipients.
Method 2: Mail Merge with Outlook, Word, and Excel
As you know, Gmail has limitations of email sending quota. If you need to send more emails, you can use Outlook.
Step 1. Prepare the email list in an Excel file. Save the email list file as.CSV format.
Step 2. Open a new Word document. On the Mailings tab, in the Start Mail Merge group, choose Start Mail Merge > E-mail Messages.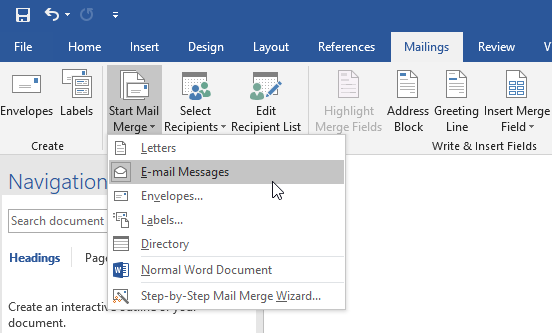
Step 3. Click Select Recipients > Use an Existing List. You can also import the excel list to Outlook and choose from Outlook contacts.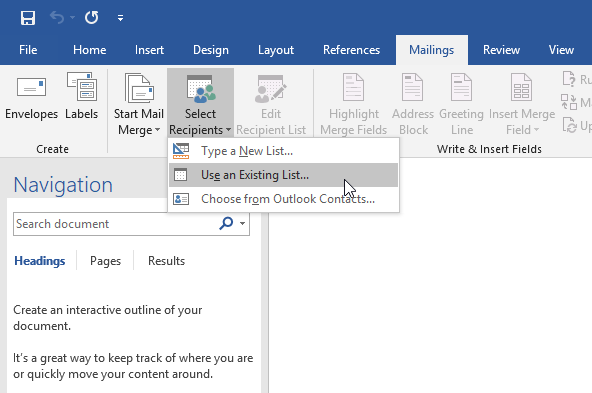
Step 4. Edit the recipients if needed.
Step 5. Craft the email and add personalized content to the email message. In the Write & Insert fields, select Greeting line and Insert Merge Field to insert custom content.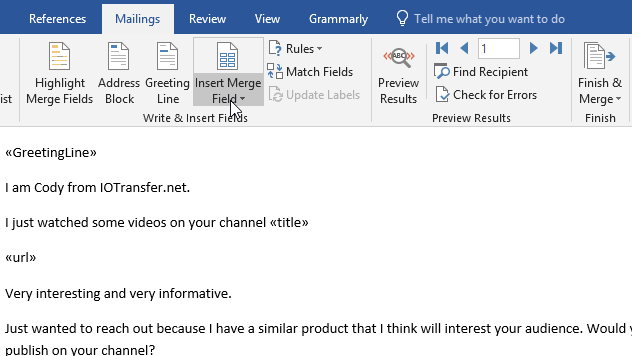
Step 6. Click Preview Results to check preview some of the emails from them and then click Finish &Merge > Send Email Messages.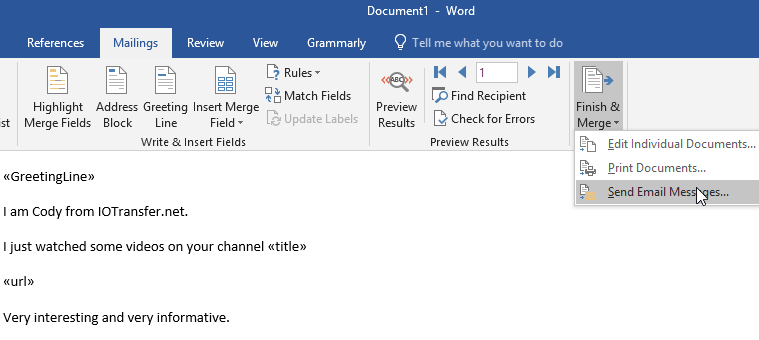
Method 3: mail merge with Google Sheets without addon
If you want to send mail merge with Gmail but without any addon, you can use Google Sheets custom script. This script is presented by Google Expects. I who has no any experience in coding find it very easy to use. Let me show you how to use it.
Step 1. Make a copy of this spreadsheet.
Step 2.Update the sheet based on the data you want to include in the email content and most importantly update the Recipients column with email addresses you would like to use in the mail merge.
Step 3. Create a draft mail in your Gmail account using markers like {{First name}}, which correspond to column names, to indicate text you’d like to be replaced with data from the spreadsheet. You can change new columns and change the column, but don’t change the Recipients column name. 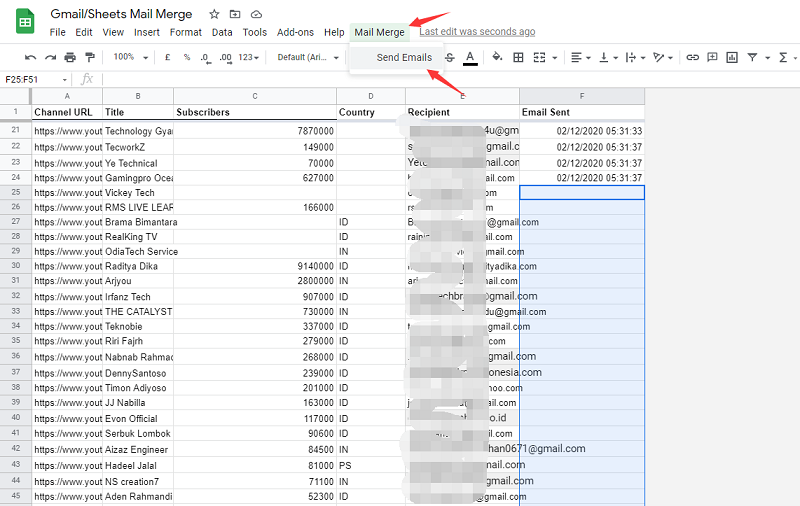
Step 4. In the spreadsheet, click on the custom menu item Mail Merge > Send Emails. When running it for the first time, a dialog box will appear and ask you to authorize the script. It is made by Google, so just allow it.
Step 5. When prompted enter or copy/paste the subject line used in your draft Gmail message and click OK to send the emails in bulk. The Email Sent column will update with the message status.
For some customization, you can click Tools > Script Editor to update the script. The creator has added notes within the code, so you should know what to change when you read it. For example, I have changed the replyTo email, so recipients will reply my email to another email account. 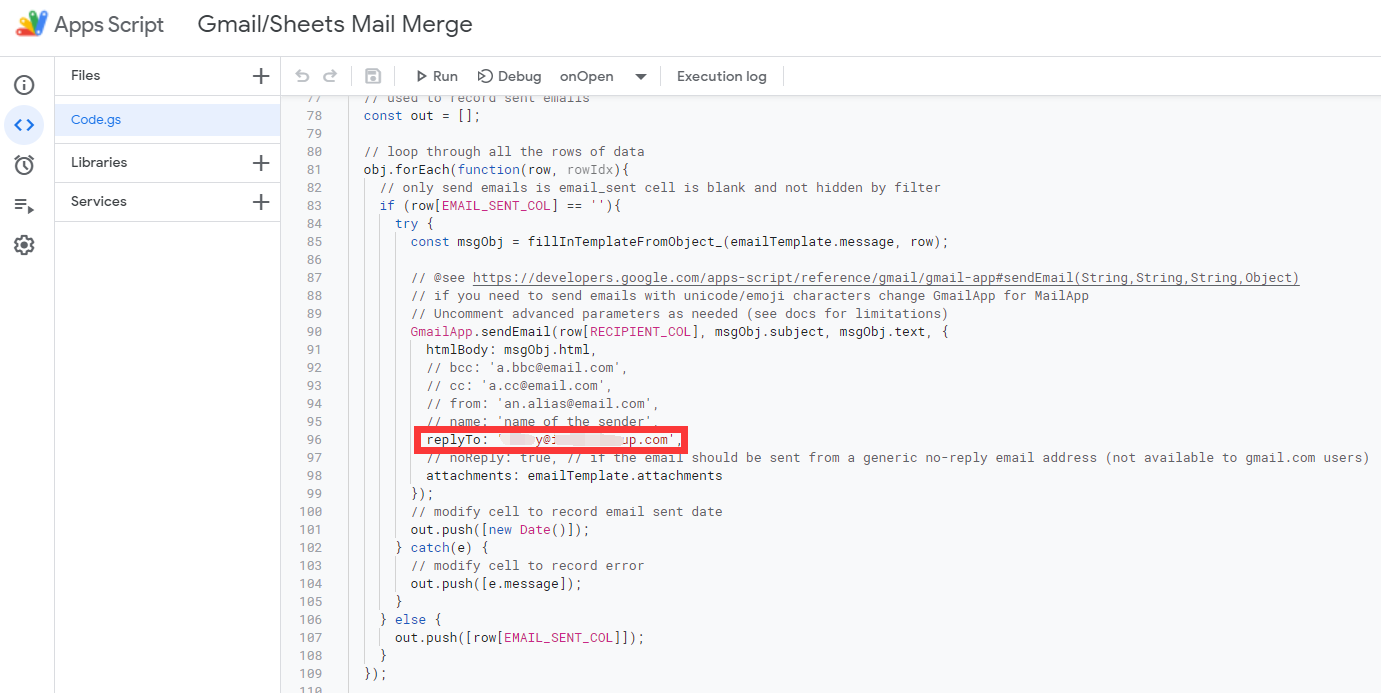
If you use are a free Gmail user, you can send emails to 100 recipients per day. To send more, you can upgrade to the Google Workplace accounts to send emails to 1,500 per day.
Bonus: mail merge on iPhone
Sometimes, you may not get a computer around you, and all you have is an iPhone or iPad. In that case, you can use your iOS device to run a mail merge.
Step 1. Download Shortcuts app from AppStore. Workflow is a free app that obtained by Apple not long ago.
Step 2. Get this Mail Merge workflow.
Step 3. Run this workflow and follow the instruction to perform Mail Merge on your iPhone.
Conclusion
Email Merge can save you lots of time when you want to send a personalized email to multiple recipients. All these three methods will work for Mail Merge. Now it is your turn, which of these methods are you find the most helpful? Share your thoughts in the comments section.