When you try to use Disk Management to shrink a volume, usually C: drive, in Windows 11/10/7, you may find the shrinkable space is far less than the free space on that drive. You can also see a note as below:
“You cannot shrink a volume beyond the point where any unmovable files are located. See the “defrag” event in the Application log for detailed information about the operation where it has complete.”
In this article, I will show you how to increase the available shrinkable space. The reason why Windows won’t let you shrink the volume is as message suggested because there are immovable system files at the very end of the volume.
Certainly, you cannot move the unmovable files, but you can delete them. The unmovable files include Hibernation, Pagefiles, System restore points, etc. It is hard to see which unmovable file caused this problem, so you may need to try one or more of the steps below to actually solve it.
1. Disable System Restore
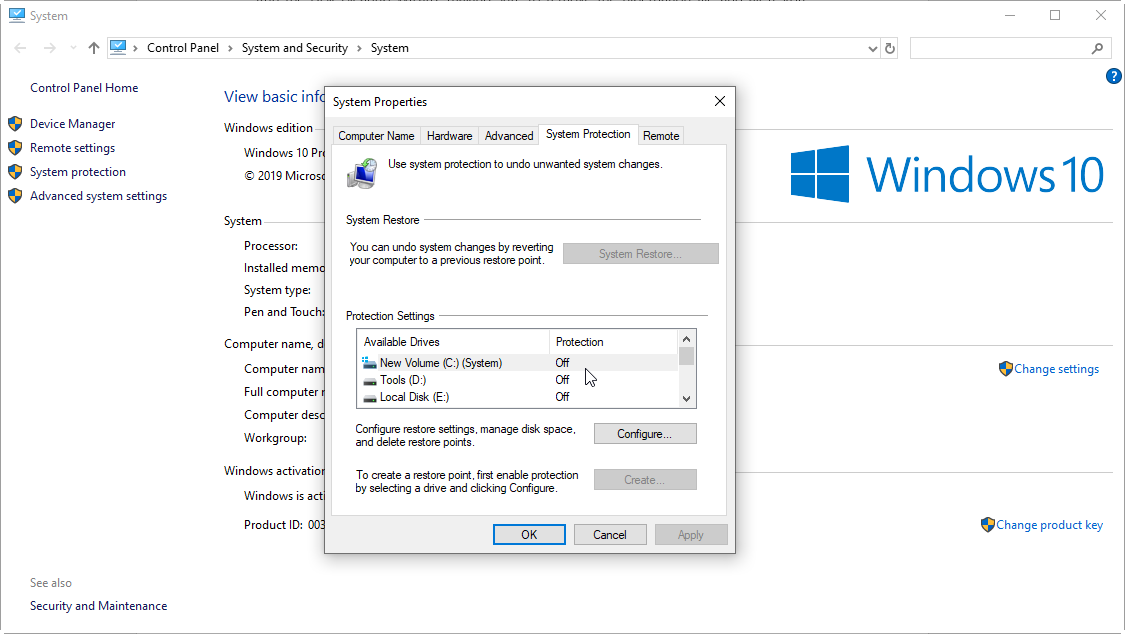
There are many ways to get to the System Restore settings. The most straight way to turn off System restore is from the search box. You can also right click on This PC and select Properties > System Protection. From there, you can easily turn off System Protection.
If you get the error no enough shrinkable space when trying to shrink C: drive, then turn off protection for C: drive, which is the most case.
2. Run the Disk Cleanup
Run the Disk Cleanup Wizard, making sure to remove the hibernation file and all restore points.
Step 1. Open File Explorer on your computer, then right-click on the hard drive to access the “Properties” option;
Step 2. Press the “Disk Cleanup” option;
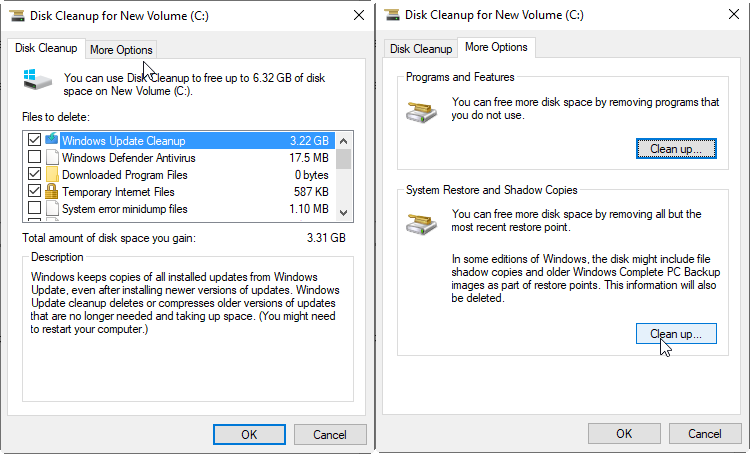
Step 3. To free disk space, mark the files that will be deleted and start cleaning by pressing the “Ok” button.
Step4. Click “Clean up system files”. In the new window, select Hibernation file, temporary files, and other files that you don’t think needed.
Step 5. After that, click More options, to remove system restore points.
3. Disable the pagefile
Pagefiles is also a common case for causing shrink volume no enough space problem. You can follow the steps below to disable it.
Step 1. Right click on This PC and select Properties. If you don’t see This PC icon on your desktop, then you can open File Explorer and click This PC from there.
Step 2. Click Advanced System Settings.
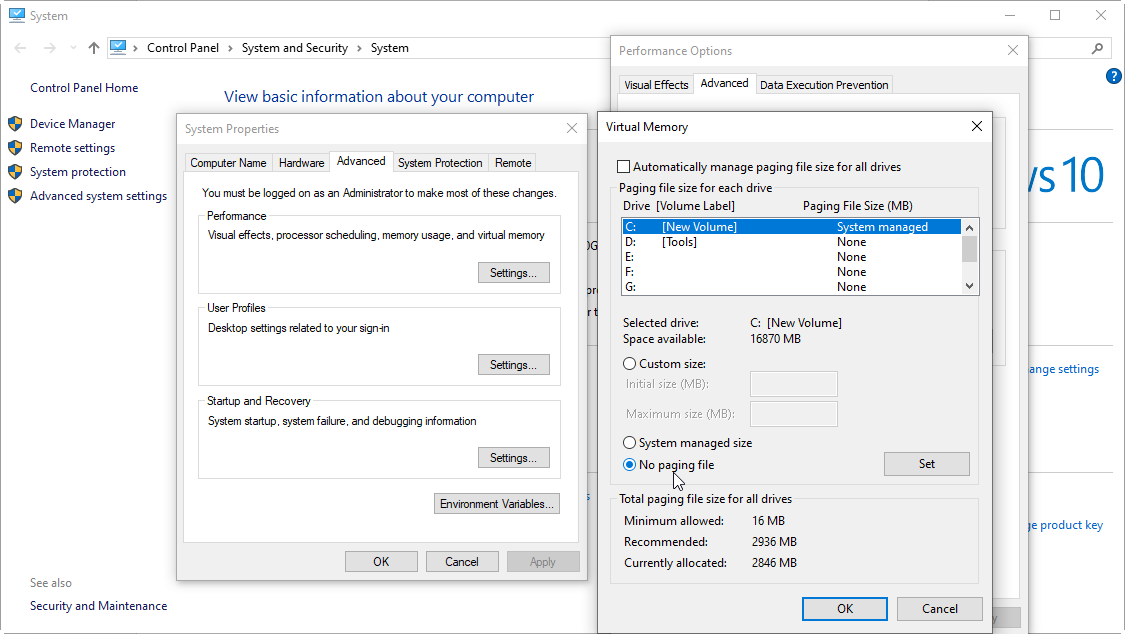
Step 3. In the new pop up window, click Settings under Performance.
Step 4. Click on the Advanced tab, and then click on Change under Virtual Memory.
Step 5. In the new pop up window, uncheck the option “Automatically manage paging file size for all drives” and check the option “No paging file”. Then click OK to apply the changes.
After that, reboot the machine, and then find the C:\pagefile.sys file and delete it. You need to first show hidden files before you can see the pagefile.sys.
4. Disable kernel memory dump
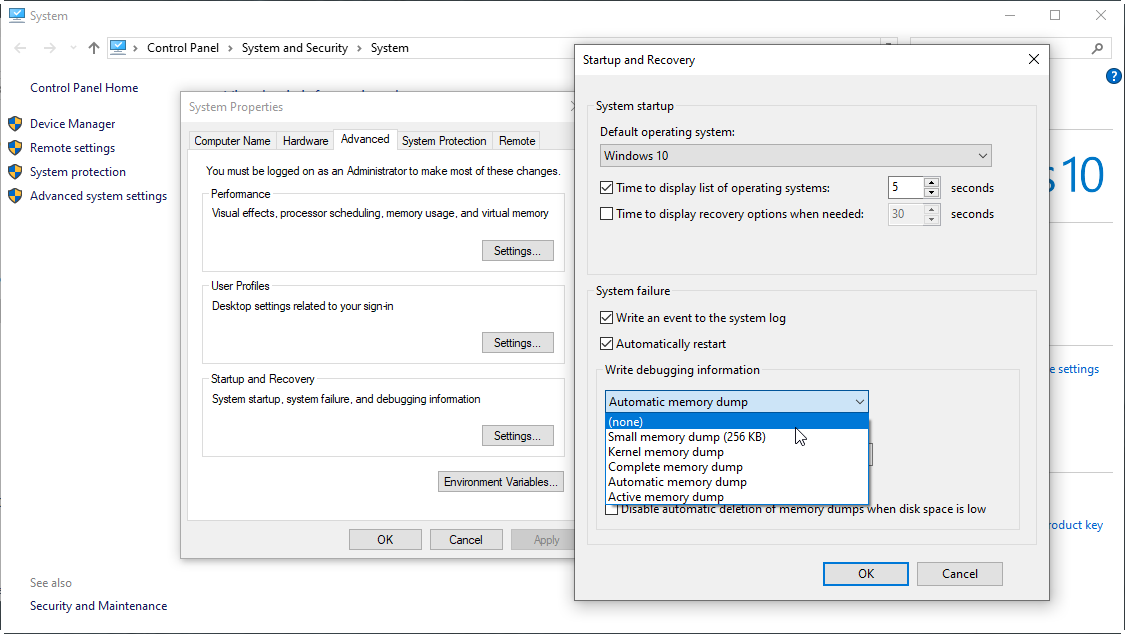
In the same Advanced Settings, click Settings under Startup and Recovery. In the new pop window, click on the drop-down menu under “Write debugging information” and select “None” to disable the kernel memory dump.
5. Disable Hibernation mode
This may not be necessary because the Hibernation mode is disabled by default in Windows 8/8.1 or Windows 10. In case otherwise, you can run the command “powercfg /hibernate off “in the Command Prompt.
To open a command prompt window, you can press Windows + R key, type “cmd” in the bx and press Enter.
After all these steps, the shrinkable space should be increased. Then you can shrink volume without receiving the error “there is not enough space available on the disk(s) to complete this operation”.
Bonus: Shrink volume with free software
After trying these steps above, you certainly can increase the shrinkable space. The amount depends on your situation. If you are still not content with the shrink space amount, you should try this program, EaseUS Partition Master. You can use it to shrink a partition as long as there is free space.
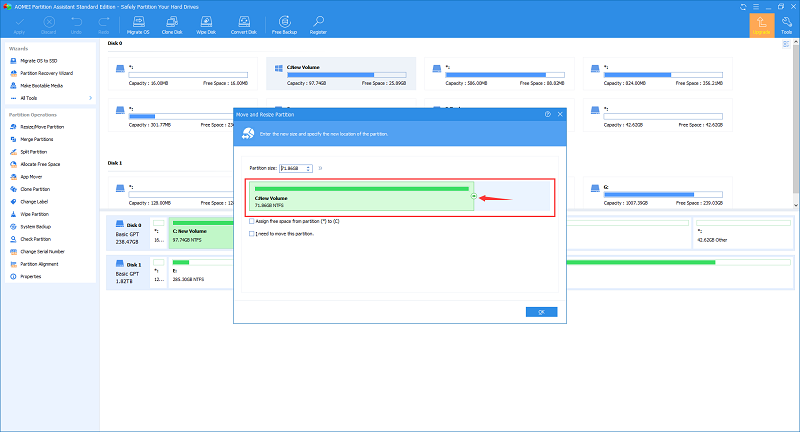
Compared to Disk Management, this program allows you to move partition, which means you can add unallocated space to any partition on the same disk whether it is adjacent or not. As you see from the screenshot above, it offers many other features. Sometimes, it requires a reboot to complete the task. Other than that, it is definitely a great replacement for Disk Management.
Thanks!
Very helpful! Thank you!