There are many advantages in using GUID Partition Table (GPT) over Master Boot Record (MBR). Besides, there are a few cases, you have to use GPT partition style instead of MBR. Luckily, you can free convert MBR to GPT without losing data or affecting your system.
MBR VS GPT
MBR disk supports up to 2TB capacity. If you have a larger than 2TB disk, you will see the space beyond 2TB as unusable it initiated as MBR disk type. In Windows, the maximum capacity of GPT disk is 256TB, which is more than enough for many cases.
MBR disk only supports up to 4 primary partitions while GPT disk allows you to have up to 128 primary partitions. On MBR disk, you will usually see 2 or 3 primary partitions along with a few logic partitions located in an extended partition.
When you try to reinstall Windows, you can receive an error “Windows cannot be installed on this disk. The selected disk has an MBR partition table.” That’s because your system is using UEFI mode. In which case, Windows can only be installed on GPT disk. To work this around, you can either change UEFI mode to Legacy mode or convert MBR to GPT disk. Since Windows 11 only works with UEFI mode, so you should convert MBR to GPT if you want to upgrade to Windows 11.
As long as your hardware and operating system support GPT disk, then you should use GPT disk. Windows 10, Windows 8, Windows 7 all read GPT well, but Windows 7 32-bit needs to be booted from BIOS, which means you must use MBR partition style for a boot disk.
Method 1: Convert MBR to GPT in Windows 10/11 Safely
If your computer is running Windows 10 or Windows 11, then you can use a Windows built-in feature BR2GPT tool to convert system disk from MBR to GPT without affecting OS. It is available in Windows 10 v1703 and later versions. You cannot use it to convert non-system disk.
If you are running the previous version of Windows, you can upgrade your Windows or create a Windows recovery disk or installation disk from a computer that is running Windows 10 v1703 or later.
Within Windows 10 v1703 or later
Step 1. Open an elevated Command Prompt window. You can search for “command prompt” (without quotes). In the search result, right click and select Run as Administrator.
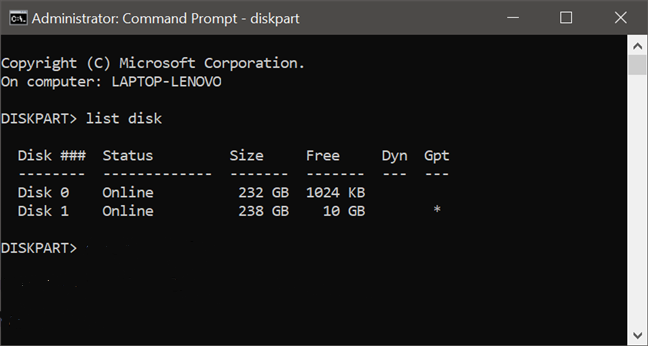
Step 2. Type “diskpart” (without quotes) and press Enter. Then type “list disk” to display all the info of all the available disks installed in this computer.
Step 3. Then you know the disk number of the disk that you want to convert. Type “Exit”.
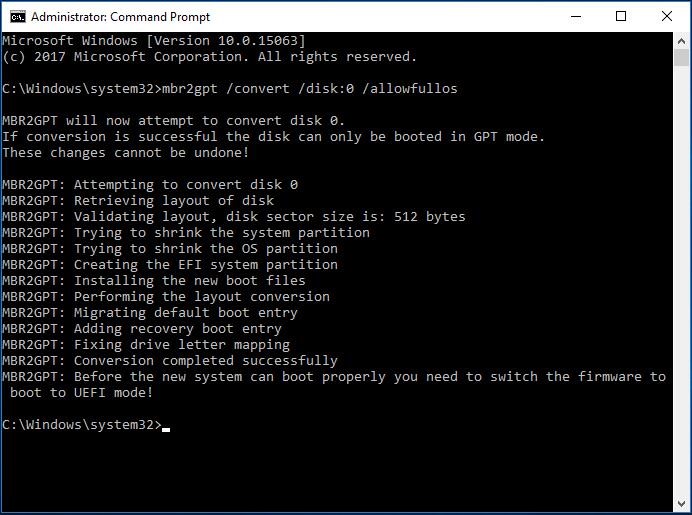
Step 4. Type “ mbr2gpt /convert /disk:[disk number] /allowfullOS” and press Enter. For example, for me the disk 0 is the system disk that I want to convert, so I just type “mbr2gpt /convert /disk:0 /allowfullOS”.
That’s all. Your system disk will be converted to GPT. After a reboot, you are good to go. If your system fails to boot after the conversion, boot into BIOS to enable UEFI mode.
Under Windows PE
If you intend to use Windows installation disk and boot your PC into Windows PE. then remove the allowfullOS switch, so the command would be “mbr2gpt /convert /disk:[disk number]”
If possible, it is always recommended to use MBR2GPT.exe in the full OS environment because I have had a glitch converting MBR disk under Windows PE.
Method 2: Convert MBR to GPT with Third-Party Software
All these three free methods are done under the command prompt. If you are looking for an easier method with a GUI, you should check out EaseUS Partition Master. With its concise interface, you can convert your hard drive to GPT in a few clicks.
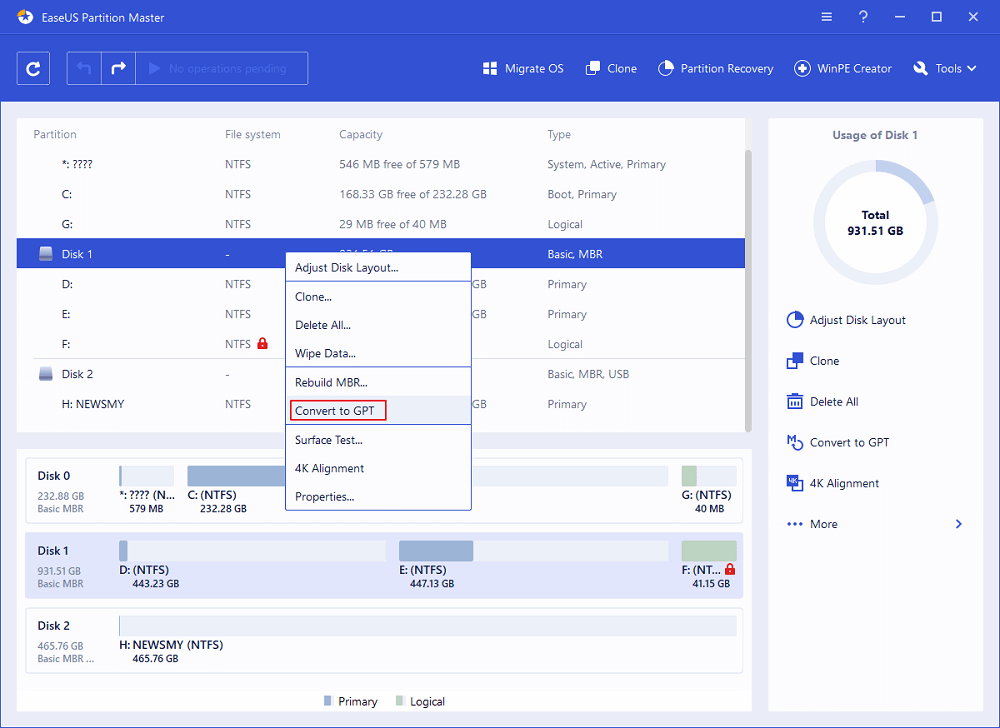
As you can see from the screenshot above, EaseUS Partition Master can help you do more than just disk conversions. You can also use it to migrate OS to SSD, extend C: drive, create Windows PE disk, etc. It is a little pricy for this feature only, but it is worth the money if you consider all the features.
Method 3: Convert MBR to GPT with Free Tool [Risky]
If you are running Windows 8/8.1 or Windows 7, you can use the open-source software GPTGen to convert MBR to GPT without data loss for free. You can free download the latest version on Github.
GPTGen is also a command-line utility and you have to know the physical disk number of your hard drive. For that, you can refer to method 1 or method 4 from diskpart. Once you know the disk number, follow the steps below to get started.
- Unzip the GPTGen zip file that you just downloaded.
- Open up a command prompt as Administrator.
- Type “cd [GPTGen file location path]” to navigate to where you have extracted GPTGen. For example “cd D:\Chrome Downloads\gptgen-1.2.1\x64-Release”
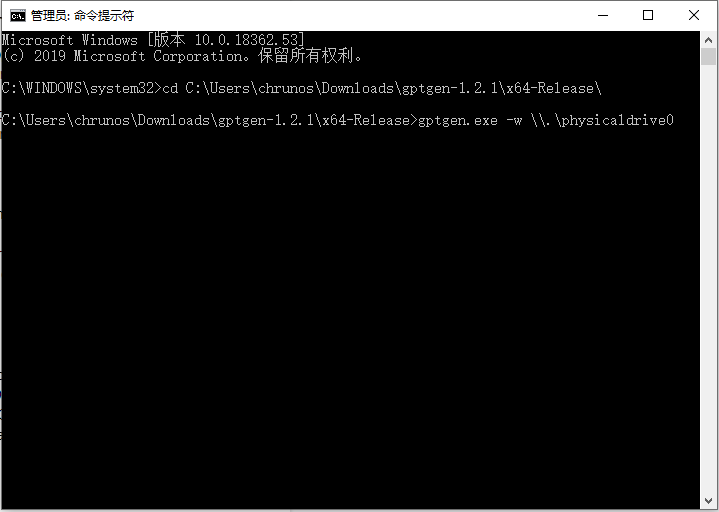
- Run command “gptgen.exe -w \\.\physicaldrive[disk number]” and press Enter.
- When it is done, reboot your PC. After reboot, run check disk (chkdsk) on the converted disk just in case.
Method 4: Convert MBR to GPT with DiskPart [Data Loss]
If you don’t care about that data, you can also use the built-in utility DiskPart.exe to erase the hard drive and convert it to GPT. If you want to convert the primary disk where your current system is installed, you need a Windows installation disk and convert MBR to GPT while installing Windows, because you need to wipe the system disk.
Step 1. Boot your PC from an Installation disk or Windows recovery disk. From the installation disk, you can go to the Windows Setup screen and press Shift + F10 to bring out the command prompt.
Step 2. Type “diskpart” and press Enter.
Step 3. Type “list disk”.
Step 4. Identify the disk that you want to convert to GPT and type “select disk [disk number]”. Generally, the system disk is number 0, so you just type “select disk 0”.
Step 5. Type “clean” to delete everything on the hard drive.
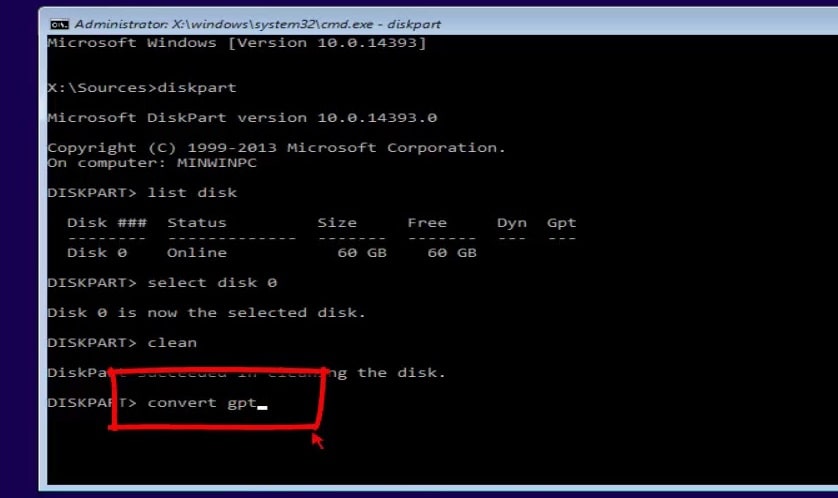
Step 6. Type “convert gpt” to convert to GPT.
That’s it. You have converted the disk from MBR to GPT. Right now, you need to make sure you have UEFI mode enabled before trying to install Windows, otherwise, you will receive the error “Windows cannot be installed to this disk. The selected disk is not of the GPT partition style”.
If you want to convert the secondary hard drive, you just need to launch the Diskpart while Windows running. You can simply press Windows + R key combination to bring the Run window, and then type “diskpart.exe” (without quotes). Then you can refer to the steps above to complete the task.
Conclusion
Here are four methods for converting from MBR to GPT and back. The first three allow you to do so without data loss. When possible, I recommend using the Windows built-in tool, MBR2GPT. While GPTGen is completely free, it can be unstable; I recommend it only for those comfortable with troubleshooting technical issues.
Windows Disk Management and DiskPart.exe both can be used to convert disk between MBR and GPT, but you need to first clean the disk, which means all the data will be lost. Luckily, you can use the first 3 methods to convert the disk partition style without losing data.
At 73, this PC BS still brings me to my knees! Had a “fersh” formatted HDD & was simply going to load Win 10 then MBR showed up. I spent 2 hrs working my way thru MANY convert methods here & other. Finally method 3 above worked & new Win 10 loaded in no time. MANY THANKS!
Great! Thanks for posting this. I used the last version since I wasn’t installing an operating system and didn’t care about the data.
I just made one over 3 terabyte partition when done.