You can convert images to WebP to save space or convert WebP to JPG or PNG for compatibility. In this post, I will show you 5 free methods to batch convert WebP to JPG or back.
You can do it with a single command or use a shortcut available in Quick Actions on a Mac.
WebP Image Converter Online
If you only need to convert WebP images once in a while, a free web online tool seems to be the best choice. You can find many online image converter tools with a quick Google search. CloudConvert is one of them that allows you to convert multiple files from or to WebP.
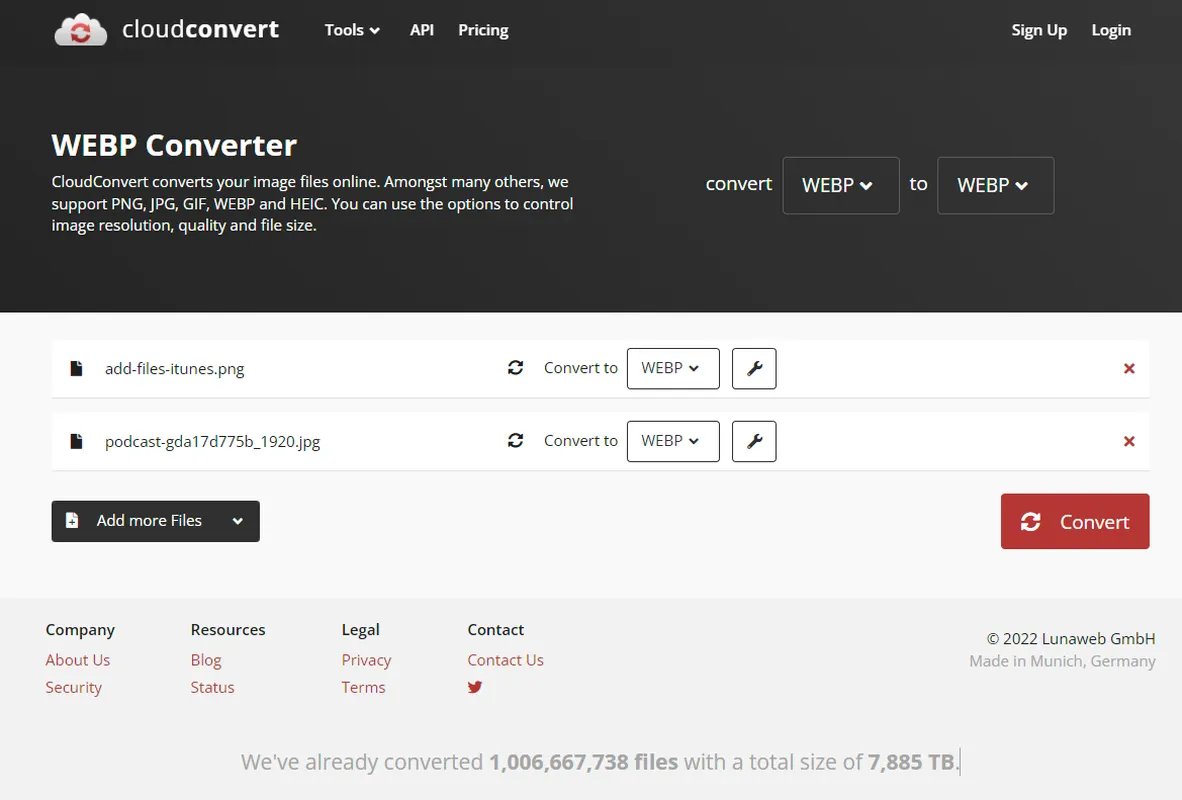
When you go to the website page, you can click to upload the images that you want to convert. You can also simply drag the files there. Then you can select the output format. If needed, you can also click the wrench icon to change other output options like quality, height, and strip (remove metadata).
When you want to convert multiple images, CloudConvert enables you to select a different output format for each image. In addition, you can also use CloudConvert to convert MKV to MP4 or other formats.
WebP Converter Shortcuts for Mac or iPhone
I want to convert WebP to JPG in a more convenient way, so I create a shortcut to do it. The Shortcuts app was first introduced on iOS 12 for automation. It is also available in macOS Monterey. If you already updated to macOS 12, try this custom shortcut I made, which is definitely the most convenient method.
I have shared my WebP Converter shortcut previously, so you can click the link to get it. Be sure to use Safari to open the link. Once you have added this shortcut, you can right click on an image (WebP, PNG, or JPG) and select Quick Action > WebP Converter.
In a few seconds, you will be asked to select a location to save the converted images. The default location should be the Downloads folder. Of course, you can also select multiple images and run this shortcut to batch convert images to WebP or convert WebP to JPG.
If you want to adjust this shortcut to resize the image or do other things automatically, you can watch this video. From it, you will learn how I created this shortcut step by step. If you have FFmpeg installed on your Mac, you can also use the To WebP shortcut for converting multiple images to WebP.
Free WebP Converter for Windows
WebPconv is a dedicated WebP to JPG converter that I prefer. While preparing this post, I have tried a lot of tools for this sort. Thanks to its clean and intuitive user interface, I love it more than others.
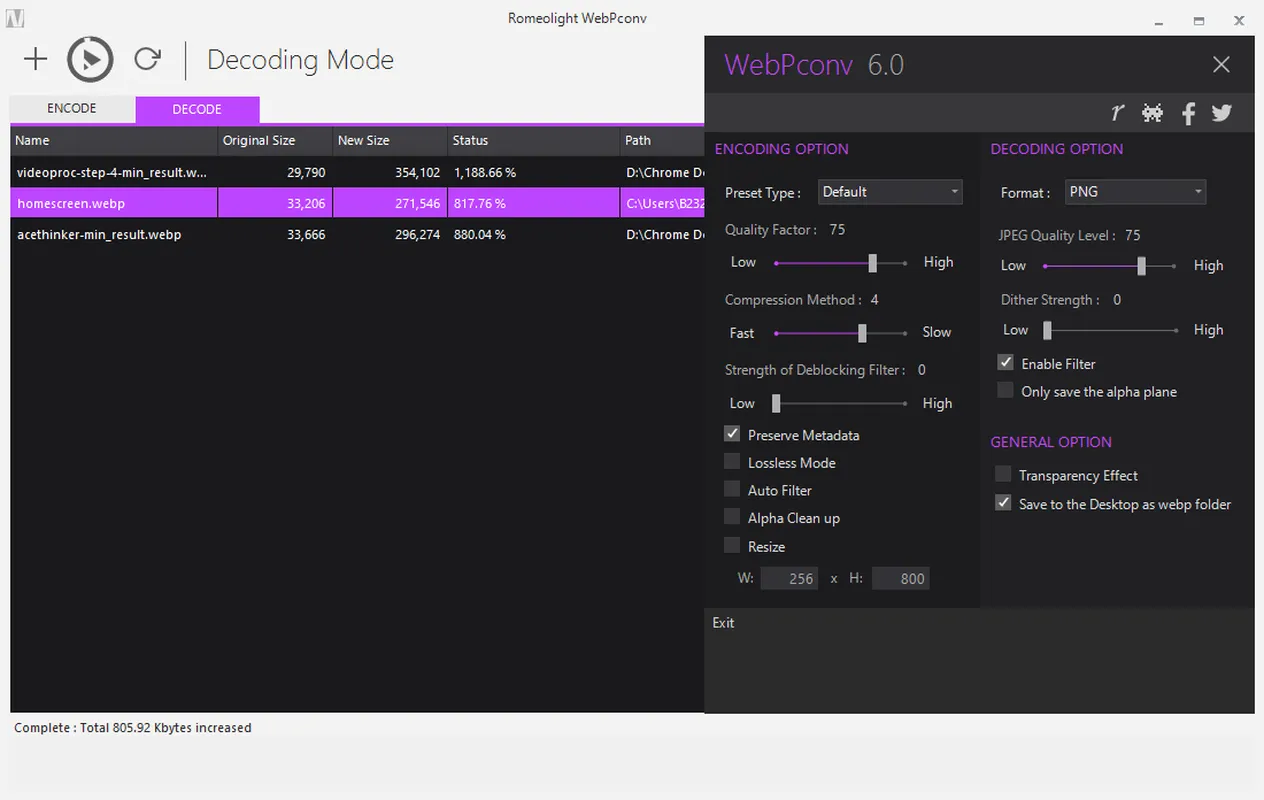
After installation, you can simply select the Decode option to convert WebP to JPG. You can click on the plus icon to add WebP images or drag them here.
When all images that you want to convert are loaded, you can click the play button to start the conversion. In seconds, you can find the converted WebP images in a WebP folder on your Desktop screen.
It also can convert JPG, PNG, or GIF to WebP under the Encode tab. If needed, you can also adjust the Encoding options such as preset type, quality, size, etc.
XnConvert available for Windows, macOS, and Linux
XnConvert is possibly the most powerful freeware for converting WebP to JPG and back. It is an image converter with a lot of features. You can use it to convert WebP to JPG while also performing picture filtering and setting various JPG output settings.
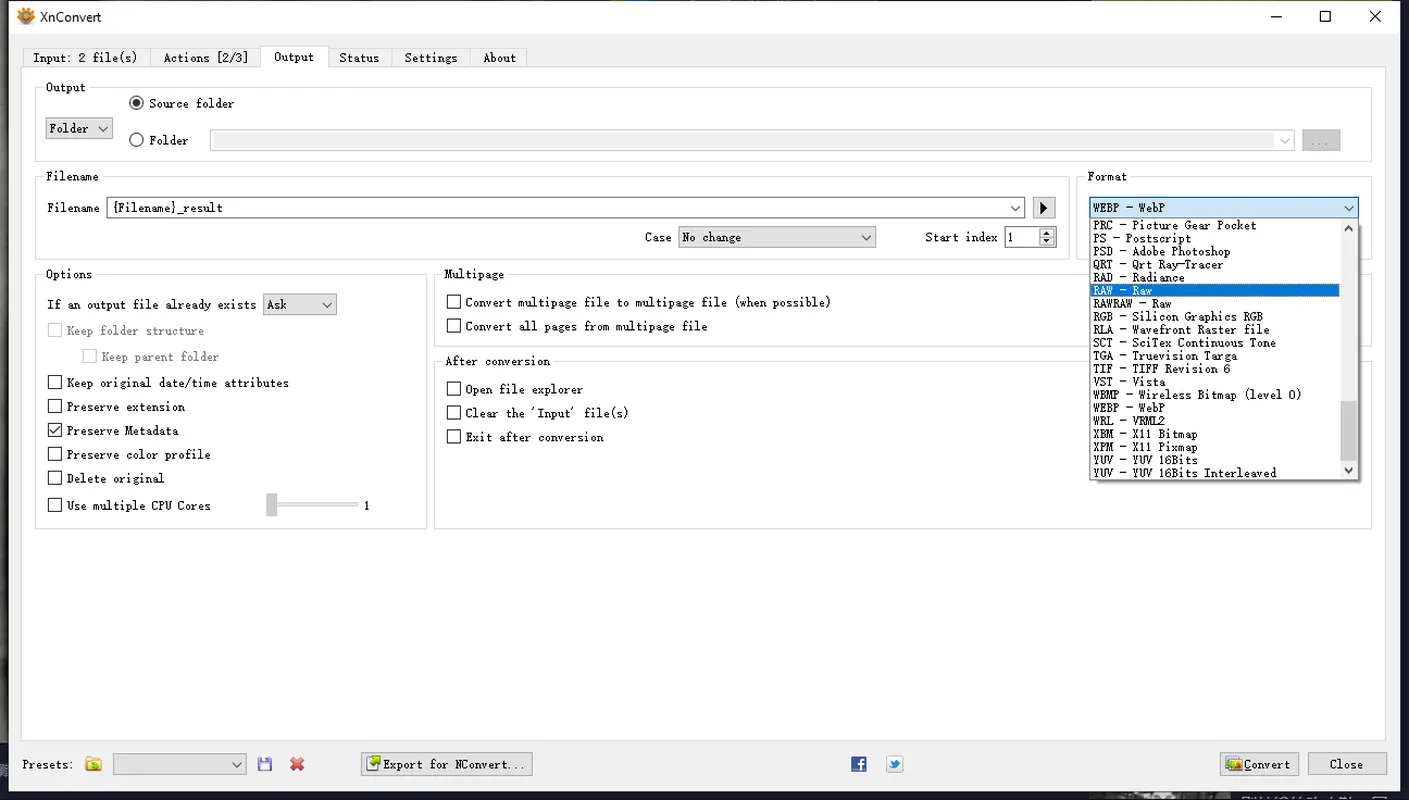
You can convert a single or several WebP pictures to JPG format and the other way around. You can easily add files and folders as input.
Under the Output tab, you can select the output format among Webp, JPG, PNG, GIF, PSD, RAW, and so many more. You may also configure other settings such as compression method, filename, metadata, etc.
To begin the WebP to JPG conversion, click the Convert button. You can also execute various actions on individual WebP photos before converting them to JPG.
In the Actions tab, you can change the brightness, contrast, and gamma, as well as add a mask, crop, resize, rotate, apply filters, change the DPI, switch the color, add a watermark, and do other picture editing.
XnConvert supports a wide range of formats, including TIFF, GIF, JPG, PNG, RAW, CSV, ICO, PGM, PDF, and many others. You can even convert photos to PDF and vice versa, add a watermark to multiple images, and much more. To be honest, it is hard to believe this is a free tool without Ads.
FFmpeg
FFmpeg is a command-line open source tool designed for processing image, video, and audio files. Before, I have used it to convert FLAC to ALAC.
You can use it to convert images to WebP or any other formats from a command prompt on Windows or Terminal on Mac. If you haven’t used it, I will show you how to install and use it step by step.
Install FFmpeg on Windows
Step 1. Go to FFmpeg to download the Windows version on your PC.
Step 2. Unzip the downloaded file and then copy the .exe files in that folder to your C: drive/USer/{yourname}.
Step 3. After that, you can press Windows + R key and type “CMD” to open a command prompt.
Step 4. Type the following command to navigate to the folder where you save the image files that you want to convert.
Cd {file path}
Step 5. Now you can run a command to convert image format. For example, this commend below is for converting an image with filename “homescreen.webp” to PNG with filename “output”.
ffmpeg -i homescreen.webp output.pngIf the filename contains space or other special charactors, you should add quotes. The above command should become this below.
ffmpeg -i “home screen.webp” “out put.png”If you want to convert every PNG file to WebP, you can run this command.
for %i in (*.png) do ffmpeg -i "%i" "%~ni.webp"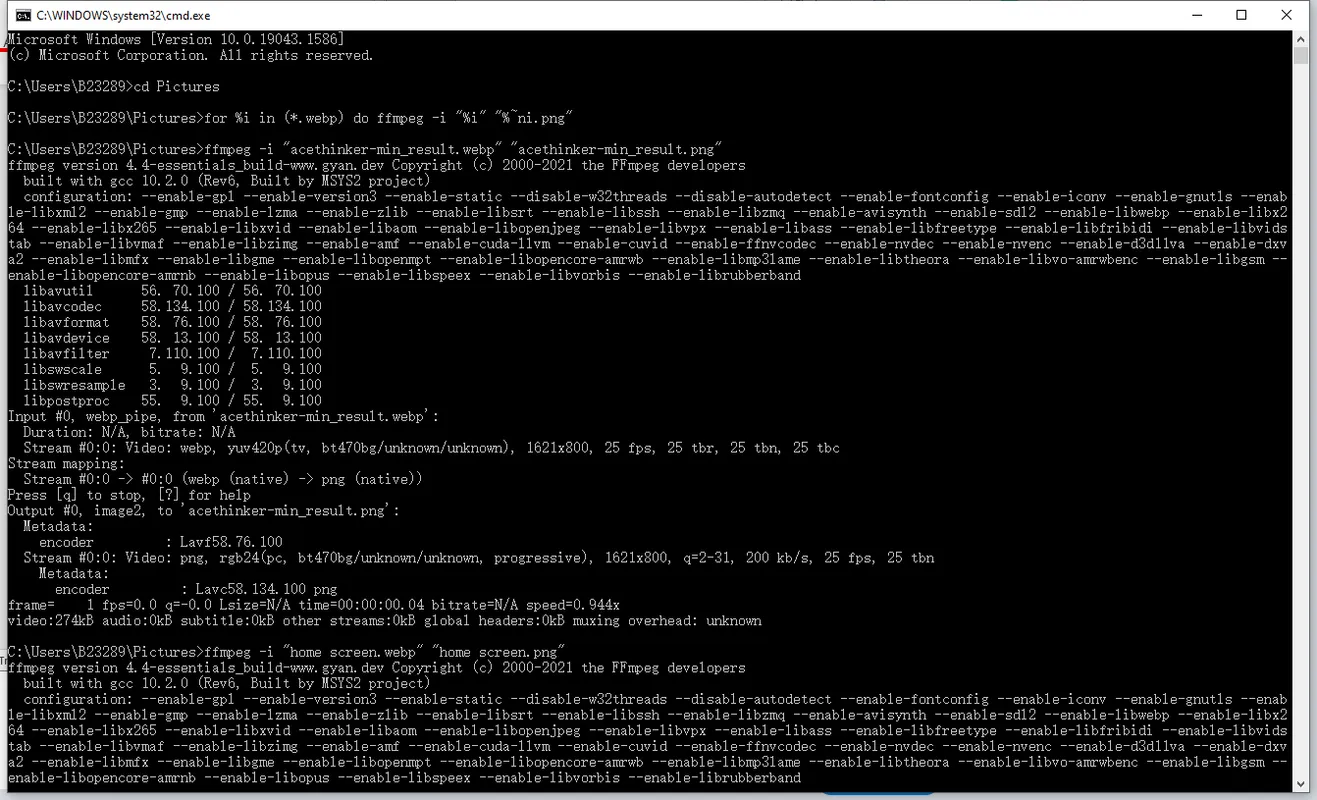
Alternatively, you can also create a bat file and you can just copy the file to the folder in which the images that you want to convert are saved. Run this bat file to convert all images into a certain format. You can create a new TXT file and enter the code below. You should change the format according to your needs. Then save the change the file extension to “.bat” from “.txt”.
@echo off
for %%i in (*.webp) do ffmpeg -i "%%i" "%%~ni.png"
Install FFmpeg on Mac
The usage on Mac is pretty much the same as that on Windows. Only the installation process is different. The convenient way to install FFmpeg would be Homebrew install. If you don’t have Homebrew installed, you can run this command in Terminal to install Homebrew.
/bin/bash -c "$(curl -fsSL https://raw.githubusercontent.com/Homebrew/install/HEAD/install.sh)"After that, you can run this to install FFmpeg.
Brew install ffmpegWhen the installation is complete, you can go to the folder containing images to be converted and open Terminal from there to run a command below for batch converting JPG to WebP
for f in *.jpg;do ffmpeg -i "$f" "${f%jpg}.webp";doneConclusion
These are the 5 methods to convert WebP to JPG or other formats and the other way around. Personally, my favorite for Mac is the shortcut because it is available in Quick Actions. For Windows, I love WebPconv simply because of its beautiful interface.
If you need to resize, change the filename, or add a watermark during conversion, the XnConvert is your best choice for Windows or Mac.
Thanks for the review. XnConvert was exactly what I was looking for and I never found it on my own searches.